Managing search and SpotIQ settings
You can manage certain advanced settings for your organization from the Admin Console. This includes enabling, disabling, and configuring the following features: SpotIQ, column indexing, summaries, and the footer for downloaded Answers and Liveboards.
| If your organization uses multi-tenancy with Orgs, you must be a cluster administrator to manage these settings, not an Org administrator. You manage these settings for the whole cluster. You cannot set them separately for each Org. |
Navigate to the Admin Console by selecting the Admin tab from the top navigation bar. Select Search & SpotIQ from the side navigation bar that appears.
If your organization uses multi-tenancy with Orgs, ensure that you are in the Primary Org, in the All orgs section of the Admin Console. You manage Search and SpotIQ settings for the whole cluster. You cannot set them separately for each Org.
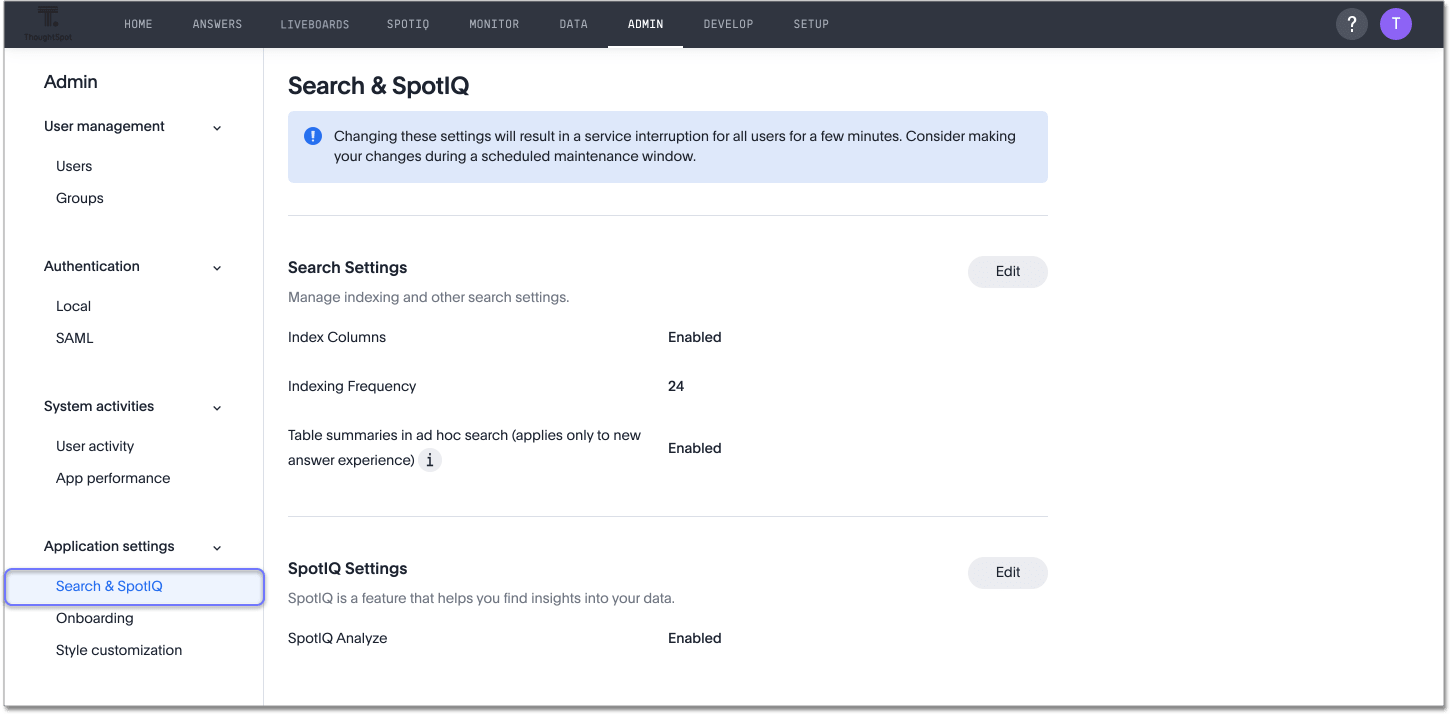
You can update the search, SpotIQ, Answer, SpotIQ, Liveboard, and footer settings from this page.
| Changing these settings results in a service interruption for all users for approximately 2 minutes. To minimize disruption, consider making your changes during a scheduled maintenance window. |
Search settings
Under Search settings, you can configure ThoughtSpot’s indexing behavior, and enable or disable summaries.
To learn more about ThoughtSpot’s default indexing behavior, refer to Manage suggestion indexing.
To manage search settings, follow these steps:
-
Select the Edit button in the Search Settings section.
-
Index columns: Select the toggle to enable or disable ThoughtSpot’s indexing of columns in new connections. If you disable this feature, all columns from new connections are set to
DONT_INDEX. Note that this change only applies to columns from new connections. You must manually set columns that already exist toINDEXorDONT_INDEX. -
Index frequency: Select a frequency for column indexing from the dropdown list. The options are 8, 16, or 24 hours. To further customize your indexing frequency and the index start time, contact ThoughtSpot Support.
-
Table summaries in ad hoc search: Select the toggle to enable or disable the display of summaries in ad hoc search.
This setting does not affect the display of summaries in saved objects, such as saved Answers, pinned tables, or metric tiles in Liveboards. -
Select Save. Alternatively, you can select Reset configuration to reset to the default. By default, ThoughtSpot indexes new columns at a frequency of 24 hours, and enables summaries.
SpotIQ settings
Under SpotIQ settings, you can enable or disable SpotIQ analyze or Monitor, as well as define the upper limit frequency for monitoring KPIs.
To enable or disable SpotIQ Analyze or Monitor, follow these steps:
-
Select the Edit button in the SpotIQ Settings section.
-
Select the toggle to enable or disable the feature.
-
Select Save. Alternatively, you can select Reset configuration to reset to the default. By default, SpotIQ and Monitor are both enabled.
KPI monitoring frequency
Use the shortest time period to check alerts option to define the upper-limit frequency for monitoring KPIs. For example, if you define the upper-limit frequency as "weekly", users in your organization will not see "hourly" or "daily" options when they create KPI alerts.
To change the shortest time period to check alerts for your cluster, follow these steps:
-
Select the Edit button in the SpotIQ Settings section.
-
Open the shortest time period to check alerts dropdown menu and select one of the following time periods:
-
hourly
-
daily
-
weekly
-
monthly
-
-
Select Save changes. Alternatively, you can Reset to default. The default frequency is "hourly".
Visualization footer settings
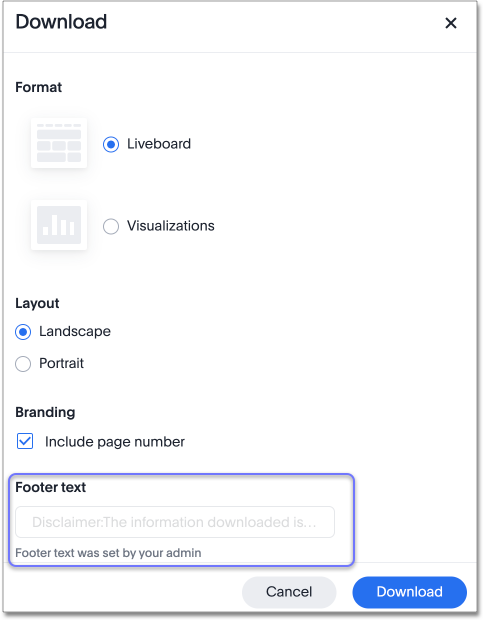
Specify the footer that appears in all downloaded Answers and Liveboards. Use this functionality to add a confidentiality disclaimer, for example. You can also allow your users to add their own footers to downloaded Liveboards.
Note that this standard footer does not apply to Liveboards downloaded with the Liveboard export API. Liveboards downloaded with the API use the footer specified by the footer_text API parameter.
To edit the standard footer, follow these steps:
-
Select the Edit button in the Visualization section.
-
Edit the text box next to Downloaded file instructions with the text you would like to appear in the footer, up to 700 characters.
The default footer is Disclaimer: The information downloaded is confidential.
To allow your users to add their own footers to downloaded Liveboards, remove all content from the text box.
-
Select Save.
Footer behavior
This footer replaces the Footer text option that appears when you download a Liveboard as a PDF. You can see a note under the footer text box: Footer text was set by your admin. You cannot edit the footer text for a specific Liveboard; you can only edit it for all Liveboards from the Admin Console.
The placement and behavior of the footer differs, depending on the format in which you download an object.
- Answer PNG or PDF
-
Text appears at the bottom of the page.
- Answer CSV or XLSX
-
Text appears between the Data extracted information row and the Filter rows.
- Liveboard PDF
-
Text appears at the bottom of every page in the PDF.
Related information